What Is It?
ΔStop 100 is a dedicated enlarger timer that uses logarithmic, f-stop based timing instead of linear seconds. You set a base exposure in stops and every click changes exposure by a fixed fraction of a stop, so the math stays the same no matter the print size or paper type. That means faster test strips, clearer intent with every change, and less guesswork when a print needs a tiny nudge instead of a full second.
It behaves the way photographers already think: exposure as stops, not time. The interface is focused on repeatable decisions, so you can move from test to final with confidence and keep a consistent record of the choices that got you there.
What Is F-Stop Printing?
Traditional timers measure time linearly, so the difference between 7 and 8 seconds is not the same change as the difference between 14 and 15 seconds. F-stop printing measures exposure in stops, where each step represents a doubling or halving of light.
Because each step is a constant ratio, your adjustments are predictable and comparable. Half- and third-stop changes feel natural, dodging and burning are easier to keep consistent, and notes from a previous session translate cleanly when you change paper size, contrast, or enlarger head.
ΔStop 100 applies this concept directly to the darkroom, without menus, math, or mental gymnastics. It gives you a repeatable workflow built on exposure theory you already use in the camera.

How Does It Work?
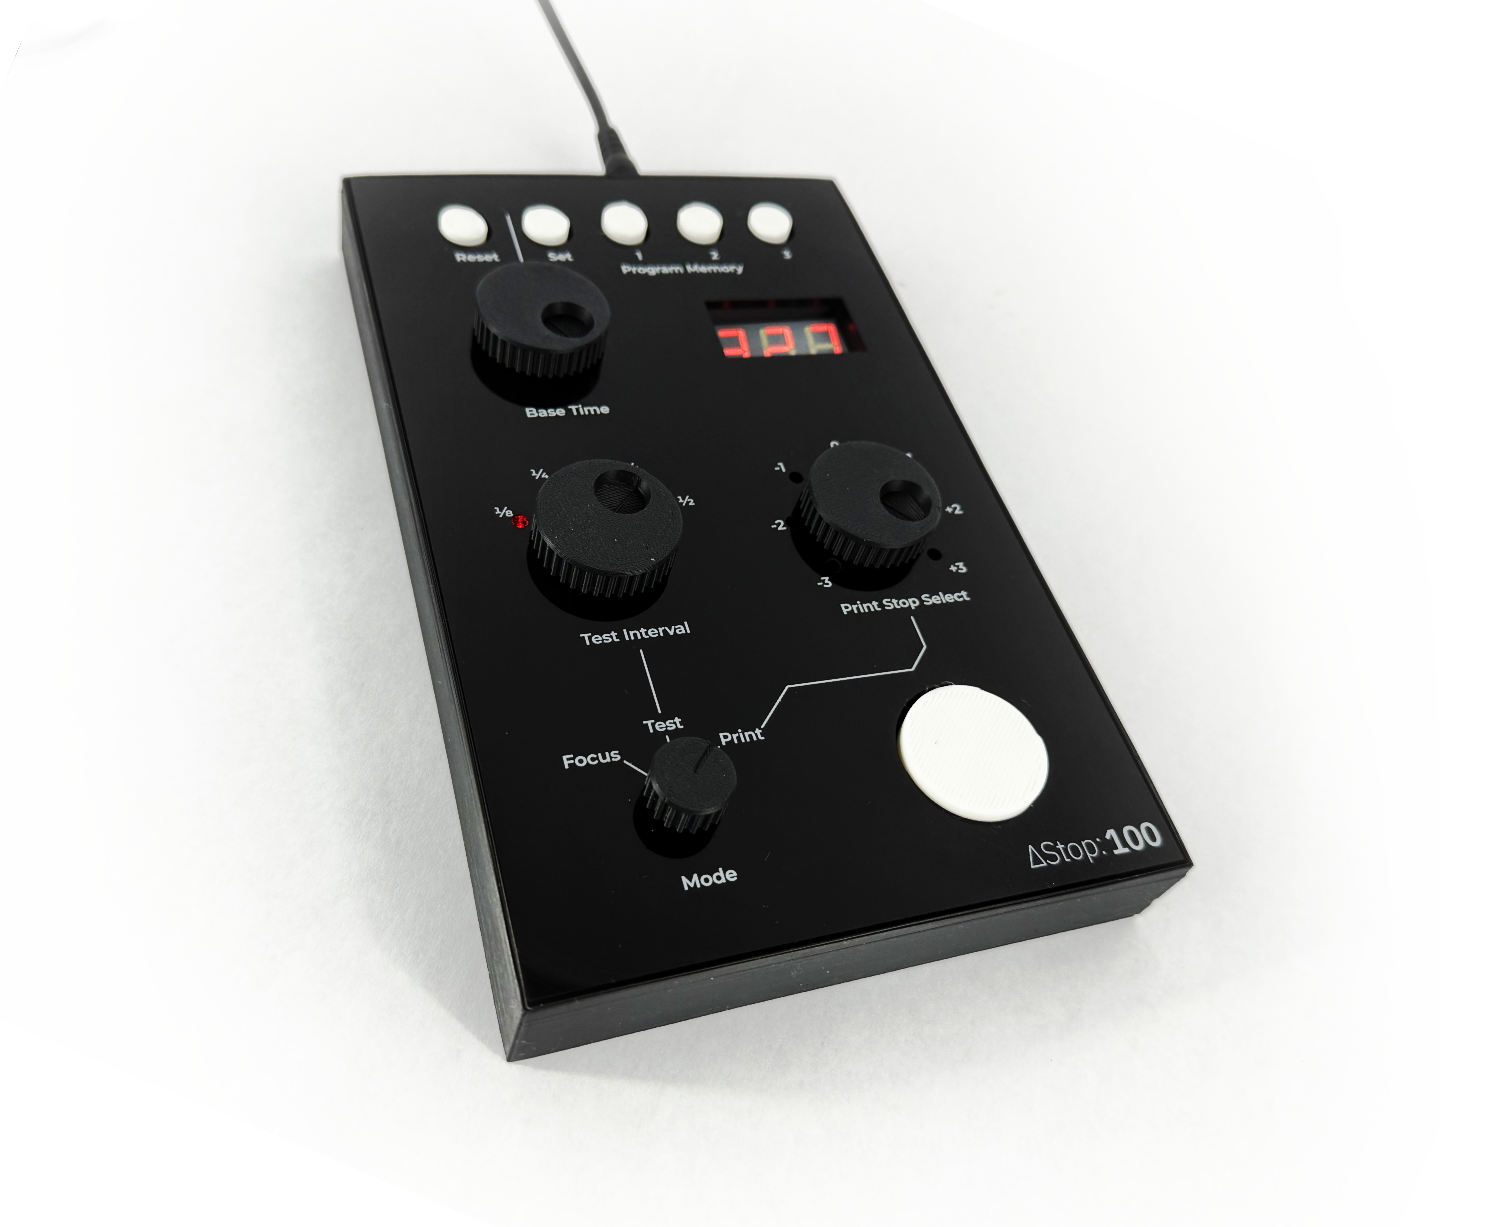
- First, set the mode to Test.
- Then, set a base time. The default is 30 seconds, and you can use the Base Time adjustment dial to set the exact time from which you want to start.
- Now select a Test Interval. That sets the size of each step from -3 from your Base Time up to +3.
- Make your test strip. Press the start button to expose the full sheet of paper, and then make the test strip by sequentially covering strips of the paper and pressing the start button until you have seven strips on the paper.
- Rinse and repeat with different times and intervals until you find an ideal setting.
- Finally, switch the mode to Print and use the Print Stop Select dial to choose which segment of the strip you want to print.
- Optionally, store the chosen setting in the Program Memory for later use.
Who Made This?
This is a project by John Jones, an avid film photographer and general maker. It's one of many projects John has done to assist in his film making process over the years and he's excited to share this project.